
Fun fact: With proper maintenance, home flooring can last from 10 years to several decades! Tile floors can even last as long as your house itself.
Not so fun fact: In Australia, falls are the main cause of hospital admissions due to injury in people older than 65. Injuries due to slips and trips also make up 20% of lost time at work every year. Many of these folks first had a slipping accident, which ended up in a complete fall.
That said, keeping your floors immaculate, debris- and spill-free is key to a slip- and fall-free home.
But when you’re busy with work, it can be difficult to find the time to clean your house. The good news is that there’s a solution for that. You can hire a house cleaning service in Melbourne to do the mopping.
Meanwhile, knowing how to mop right is a basic but also an essential step to maintaining the safety and beauty of your floors. That’s why we’re here to help you learn the right way to mop your floors, so keep reading.
How to Mop Like a Pro: Use the Right Mop
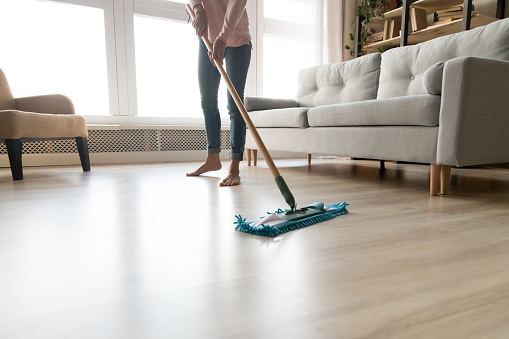
A mop is a mop, right? Not exactly. There are mops for specific types of surfaces and floors.
In the “most common mop” department alone, there are already six types. We’ve got the flat, sponge, dust, string, strip, and steam mops. What’s important is to choose one best suited for your floors.
To give you an idea, you’d want to have at least a flat mop for everyday mopping. If you have textured flooring, like ceramic tile floors, a string mop is a great choice. For smooth floors and your bathroom floor, a sponge mop should do the trick.
Stock Up on Cleaning Supplies
In Australia, the soap and cleaning compound manufacturing industry is worth $10 billion. That’s a lot of household cleaning solutions to choose from! But unless you’ve got specific and special needs, it’s best to stick with a simple cleanser.
In fact, your kitchen may already have stuff that makes for great and natural DIY cleansers.
If you’ve got time, you can make your own mix with vinegar, lemon juice, and baking soda. These DIY solutions are great for countertops, other surfaces, and bathroom floors. Don’t use them on hardwood floors though, as the acid can stain and ruin the wood.
You also want to invest in a good vacuum cleaner, plus a broom and dustpan. Get at least two mop buckets (we’ll explain later why you need two). You’d also need some rags to complete your mopping tasks.
Prep the Floor
First, clean your floors and give it thorough sweep and vacuuming. This’ll prevent a sticky, gooey, or muddy mess from forming on your floors. Also, make sure to remove dried up gunk while sweeping and vacuuming before mopping.
The less dusty and grimy your floors are, the fewer times you’d have to replace the wash and rinse water for mopping.
Get Your Buckets Ready
Remember when we said to get at least two mop buckets? One is for the floor washing solution, the other is for rinsing the cleanser off.
Use steaming hot water for both tasks, as the heat will help remove dust and debris on the floor better and faster. Add only enough cleaning solution in your wash bucket, as too much of it can make rinsing difficult. If you’re using a store-bought cleaning solution, check the label for the right amount to use.
Time to Get Mopping

Dunk the mop in the bucket with the washing solution, giving the mop head enough time to absorb the liquid. Then, wring out excess water using a mop wringer (if you have it) or your hands.
Make sure the mop isn’t dripping wet — you want it to be more on the damp side. A sopping mop can damage floors, especially hardwood, as the water can seep into the floor. Even if you have vinyl floors, you don’t want excess water since it’ll prolong drying time.
Position yourself with the mop in front of you in a way that you can move backwards and onto an unmopped area. This’ll keep you from tracking dirt (and making a muddy mess) on a cleaned spot.
If you’re using a rag mop, follow a figure-8 motion as you push the cleaning tool. This is the most effective way to use the mop’s design. If you’re using a sponge mop, a straight forward and backward motion is good enough.
If you missed sticky or stubborn dirt spots while sweeping, rub the mop over them in a quick back and forth motion. Apply downward pressure on the mop as you push and pull the mop to lift the dirt up.
Mop in Sections
Mop your floors in small sections to avoid transferring the dirt you already mopped off. After running the mop dipped in cleaning solution on one section, time to rinse it off.
Submerse the entire mop head into your second mop bucket (the one with only hot water). Apply a rapid push-and-pull motion on the mop handle to rinse off the soap solution. Be careful though, as you don’t want to spray water all around or tip the bucket to its side.
Wring the mop until it’s only damp, and then dunk it again in the bucket with the cleaning solution. Proceed to the next section of your floor and keep doing the above steps until you’ve mopped the entire floor.
Changing Your Wash and Rinse Water
Pay attention to the contents of both your wash and rinse buckets. As soon as they become grey, brown, or downright muddy, drain the water. Rinse the buckets first before filling up one with a fresh mix of cleanser and the other with fresh rinse water.
Give Your Floor a Final Rinse
If you followed the steps above, your floor should now be free of dirt and grime. But to ensure no soapy suds remain, give the entire floor a final rinse using a fresh supply of clean water. To speed up drying time, use clean rags (or another mop with a clean head) to dry off the floor.
Mop Right to Maintain Your Beautiful, Slip- and Trip-Free Floors
As you can see, there’s a little bit more to mopping than what you may have been doing all your life. But now that you know how to mop like a pro, you’ll never make the same errors again. You’ll be able to keep your floors shiny, pretty, and the most important: accident-free.
Wondering how often you need to mop or clean your home in general? In that case, head over to this blog post. You’ll learn all about the right cleaning schedules for a clean home all year round.